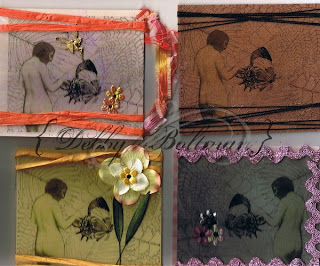
This was a first for me and somewhat of a challenge. The transparancies created made mine pale in comparison. But I love a challenge. The group is MixedMediaArtGroup and I signed up for various technique swaps. So the first is Creating Your Own Transparencies.
Here are the instructions by Debbie Dischley.
Creating your Own Transparencies
Instructions
By Debbie Dischley
The key to making your own transparencies is to use white paper for your background, black ink and black and white photos.
My sample supply list
Piece of regular white paper for stamping
Piece of white cardstock for your final master
Various rubber stamps – script for background, ruler, clock, canceled stamp, honeycomb, etc
black buttons
black and white gingham ribbon
black and white photo
black stamp pad (I use Palette Noir Black)
glue stick
scissors
black markers
1. Using the regular piece of white paper and black ink, stamp all the images you want to use for your transparency.
2. When dry, cut out all these images as close to the outside black edge as possible. Cut out the black and white photo.
3. If your script background piece is too large, cut down to the approximate size you want your master piece to be. This will become your base piece.
4. Before doing any final gluing, lay out all your pieces, ribbon, buttons – anything you are going to use. Don’t worry about overlapping… you want to do this. When you are pleased with your layout, carefully lift up the pieces and glue them in place with the glue stick. Don’t worry about gluing “off” the script edge.
5. When you are done gluing all your pieces in place, do any trimming you want to and then glue this piece to your white cardstock for stability.
6. If you want a border, use a broad black marker and ruler and draw your frame. Don’t make it neat, you want it to have an “altered” look. You can also take a fine marker and make some dots all around your master piece.
7. Now for the fun part!!! Scan your master into your PC and save the file. (If you don’t have a scanner don’t fret, see below) Using any graphic program, print out the transparency using the following information:
Inkjet printers – inkjet transparencies have a smooth side and a rough side. You will print on the ROUGH side. Tip: If you want your finished piece to have the smooth side as the “right” side, mirror image your master in your graphic program before you print.
Laser printer or copier: laser and copier transparencies are smooth on both sides… doesn’t matter which side your print on. No need to mirror image when using these.
No scanner?? Not to worry. Take your finished master to Kinko’s or any office supply store and have them print the transparencies for you.
Attaching Transparencies: My favorite method of affixing transparencies is using the Xyron machine. Run the transparency through the Xyron, right side up. Peel off the backing and place your transparency in place. Press completely down and all you will see is the background through the transparency,
Other affixing methods – brads, staples, buttons, stitching. Use your imagination!
If you have to use glue, only glue the edges – you don’t want any glue to show through the transparency.
Here is what I submitted.


No comments:
Post a Comment